End to End API Testing using Rest-Assured
I am a huge fan of rest-assured framework and have been using it since past couple of years. My current project has the demand for Mobile Automation and hence I didn’t get much chance to work on API testing lately. So, as a part of revising the already known things I thought I should practice writing some API tests using rest-assured and make it public so others too, who want to learn more about API testing and rest-assured will get a chance to know more about it.
Testing APIs
What is API Testing?
I have created this repository on github which has sample test cases explaining how to test API, checkout the file named “TestCases_for_ApiTesting.xlsx” from the repository.
What is rest-assured?
REST-Assured is a Java library that provides a domain-specific language (DSL) for writing powerful, maintainable tests for RESTful APIs. One thing I really like about rest-assured is its BDD style of writing tests and one can read the tests very comfortably like whats going on inside and how the tests will proceed.
Test Automation Strategy
Let me tell you the details about the APIs we are going to automate and test automation strategy as we need to be very much clear what all things we are going to automate and what ROI(Return on Investment) it will provide to us.
Following are the list of APIs on the restful-booker website which I have used to write end to end tests.
For sending the Update, Partial Update and Delete Booking requests it requires an AUTH token which is generated using the CreateToken API.
Since its testing end to end scenarios, hence, I planned the following test automation strategy to test the APIs so it could be tested in an efficient way:
- Create a Booking, all test data required to be sent in the body of the request will be picked from a separate
pojowhich will build the data for post request. - Assert the response of Create Booking request with the data posted using the Step 1.
- Save the Booking Id from create booking response in a variable so it could be used in further tests.
- Get Booking details using the Booking Id in Step 2 and compare with the create booking response ideally from the data posted using Step 1.
- Create a token generation method so it could be reused in Put, Patch and Delete requests.
- Update all the booking details using the Booking Id in Step 2 and AUTH token in Step 4. Generate a separate booking data using the booking data builder as discussed in Step 1.
- Assert the response of update booking.
- Update the
firstnameandtotalpriceusing the Patch request. - Assert the response returned from Patch request using the updated data that was supplied. Here, only
firstnameandtotalpricewill be asserted using the partial update data builder and the remaining values in the response will be asserted using the data built in Step 6. - Delete the booking and assert the status code.
- Get the Booking Id which is deleted(
bookingIdfrom Step 2), here it is expected to send status code 404 since the booking is already deleted.
This step confirms that booking got successfully deleted from the system.
Lets get into the code now and see how the implementation of the above steps can be done!!
Getting Started
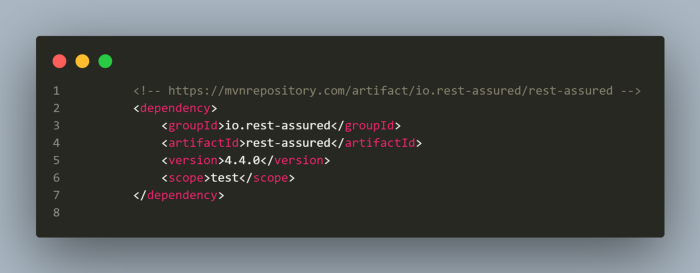
I have created this project using Maven. TestNG is used as test runner. Once the project is created we need to add the dependency for rest-assured in pom.xml file.
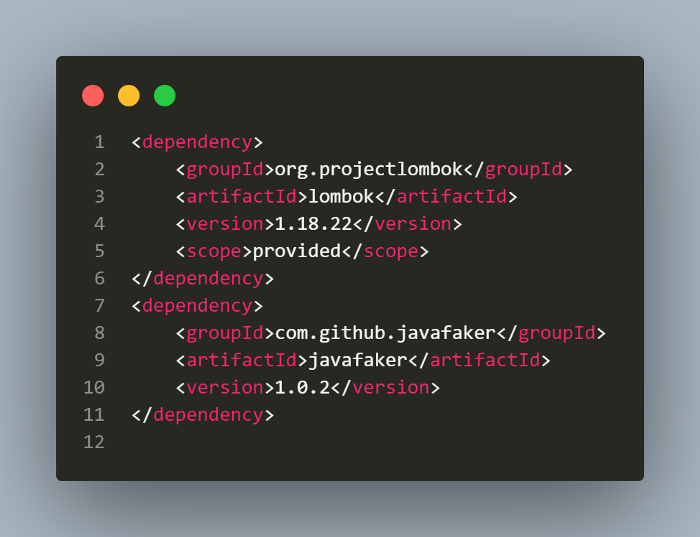
I have used Lombok in this project which is a java library that automatically plugs into your editor and build tools, spicing up your java. Using Lombok, you can save time by writing less code and just putting up annotations like @Getter @Setter instead of writing the getters and setters for a pojo class. You can add Lombok plugin in intellij, add its dependency in pom.xml and you are all set to start using it in your code. My main intention of using Lombok was to get the extensive leverage of @Builder annotation which I have used for building the test data.
For test data generation on run time I have used Java Faker which helps generating fake data on run time.
Here are the dependencies I have added in pom.xml for Java Faker and Lombok.
End to End Tests
Configuration
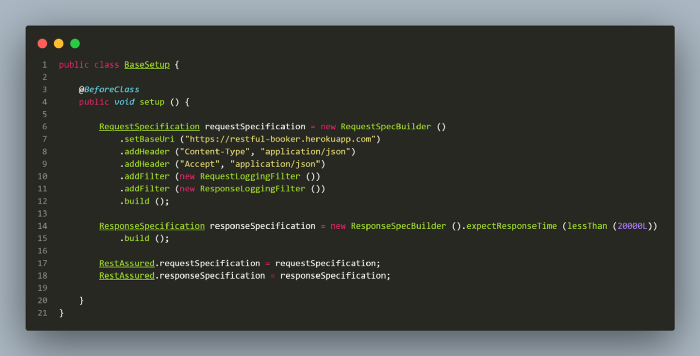
The first thing I did was creating a base setup class which has all the configuration settings for running the tests. Things like BaseURI, Request and Response Specifications, Common Headers, are all set here, using which you don’t need to set the respective specifications in tests separately and it helps in writing more clear and maintainable tests and also all configurations remain at one place.
We can also add the filters like RequestLoggingFilter and ResponseLogginFilter.
RequestLoggingFilter will log the request before it’s passed to HTTP Builder. This filter will only log things specified in the request specification.
ResponseLoggingFilter will print the response body if the response matches a given status code.
I have added a condition in response specification to check that the response time to be less than 20000 milliseconds, which means if it takes longer than that, the tests will fail.
Setting up the Tests
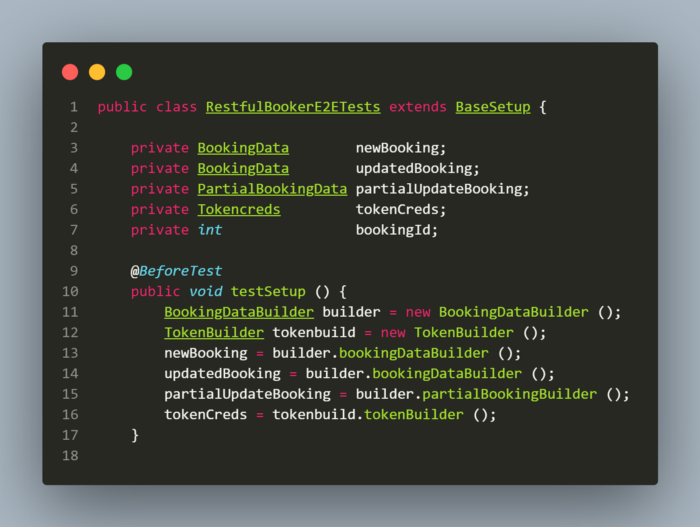
Before running any of the tests, some basic setup needs to be done for which I have created the
testSetup() method. I have instantiated the booking data builder and token builder classes and have also created instances for creating the new booking data, updated booking, partial update booking data builders. So, before any tests are run these classes are ready for being used in the tests. But before all, the setup() method from BaseSetup class will be called as the method is tagged with annotation @BeforeClass
Note: I have created an int bookingId variable which will store the booking Id value once a new booking is created.
Creating a Booking
Before I begin talking about creating a new Booking, let me first make you understand how I have used builder pattern to create body for the post request, as it is required for creating a booking.
Booking Data Builder
Following is the image of the curl request that is used for creating a booking. Considering the data that is passed in the post body, I have generated the pojo class which will help in parsing the json data in the post request.
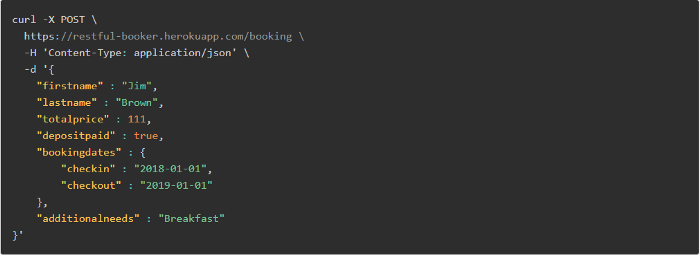
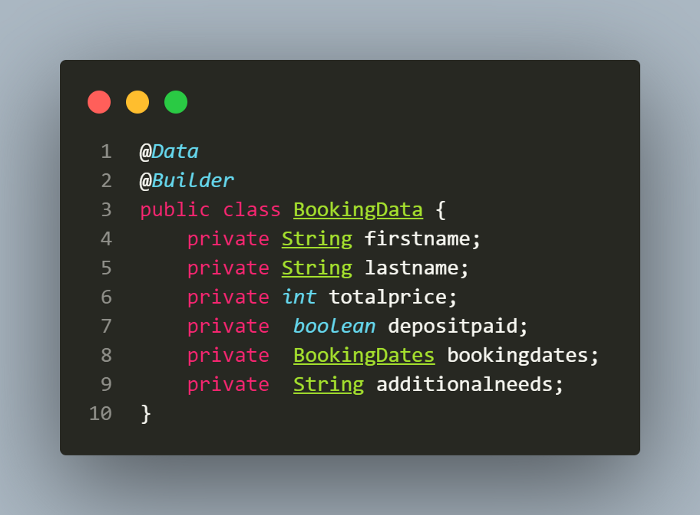
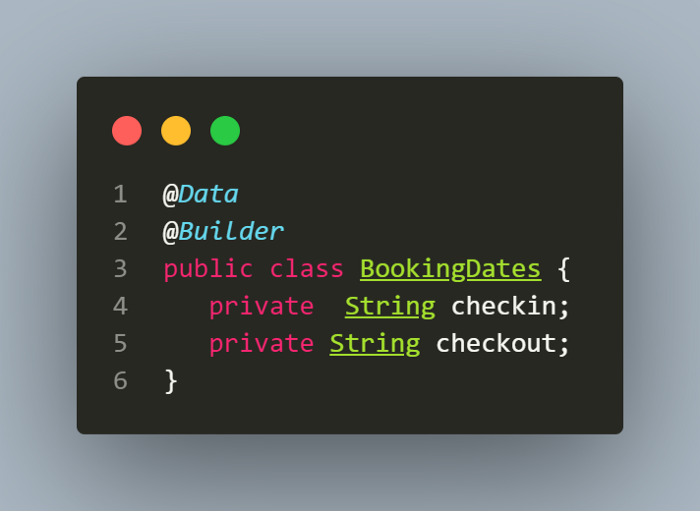
Pojo class BookingData has another class BookingDates in it. If you look closely in the post body data, you will see an object BookingDates which has the field checkin and checkout, hence new pojo class was created to handle this fields as per json data required for creating a new booking.
Note the annotations @Data and @Builder above the pojo class. These are lombok annotations, as discussed in the Getting Started section above.
Building the test data
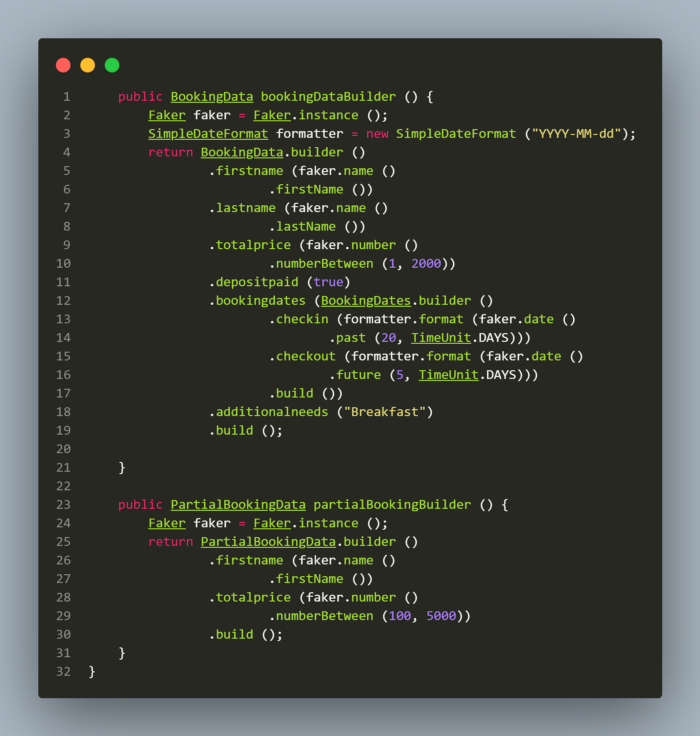
To generate the test data on run time, first of all we need to create an instance of Faker class. Once instance of faker class is created we can start using it for creating the data. Next, we can call the BookingData builder class and use the method builder() to build the test data and once you press dot and press Ctrl+Space IDE will show you the list of variables you have set inside the BookingData class like firstname, lastname, totalprice, etc.. which you can use and set the test data by passing the required methods of faker class, so your test data gets generated on runtime once the tests are run.
Creating a new Booking
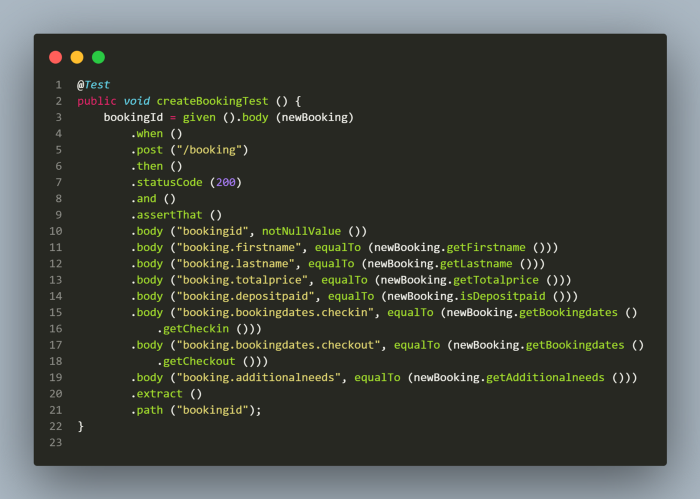
Post requests are used to create new data in the system. It is very simple to use the rest-assured methods to create a post request. Like I said in the very beginning, tests are written in BDD style using rest-assured so its quite simple to understand this framework and write the tests. It begins with given() method and then continues further using when(), post(), get(), put(), delete(), etc.. Tests can be written in fluent interface style with chaining the methods one after another which actually helps in reading the intention of the method clearly and even a beginner would be able to understand what actually the tests is going to perform.
In the create booking test, (checkout the image above), I have used the given() method then called the body() method which takes the post body as parameter and once this is done, when() method is called and then using post() request method passing the path of the API endpoint.
Next, we can start the assertions after calling then() method and checking if status code is 200. Once this assertion is passed, we can make sure that the Post API is working fine and we are good to move
ahead asserting the response body.
If status code is not matching 200 then test will fail and it doesn’t make any sense to check the response body.
Now, comes an important point, as per the test strategy we defined in the start of this blog, Saving the bookingid in bookingId variable.
For doing that I have used the extract() method and extracted the bookingid from response body using path() method and assigned it to variable bookingId.
If we run the Post API tests now, it will generate the booking and save the bookingid in bookingId variable.
Note: Only the endpoint is passed in the post() method, the baseURI will be picked from BaseSetup configuration class which is extended in the test class. BaseSetup class will also set the required headers in the test.
Updating a Booking
For updating a resource, PUT API is used. PUT requests needs all the data in the body to be sent, you can not send only the required fields you need to update unlike PATCH.
The pattern of calling the rest-assured methods for PUT request remains the same. First you need to call given() after that body() and passing the put body as parameter, then calling when() method. Here, since there is an additional requirement of passing the token without which the PUT request won’t be successful.
Let me show you how I have handled this in the test.
Token Builder

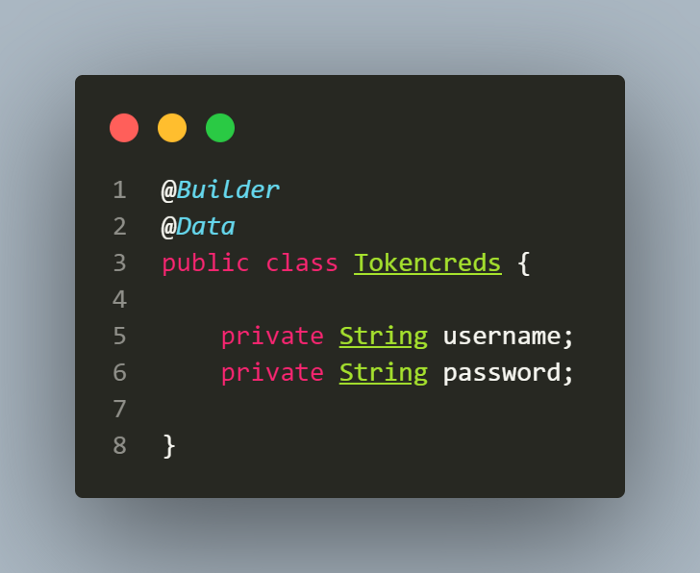
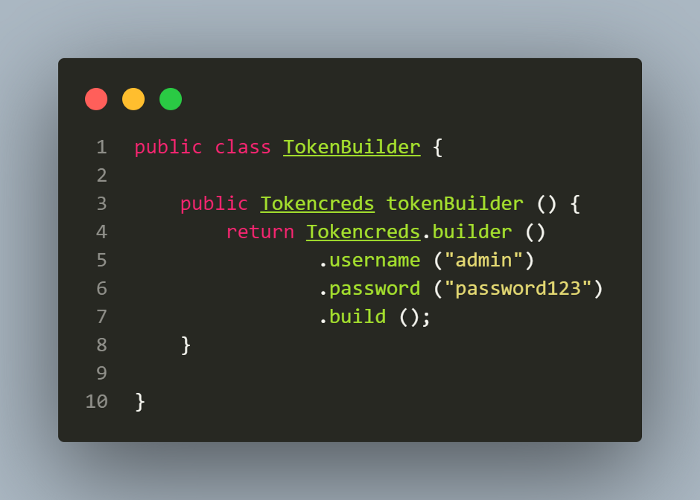
Looking at the curl request for creating an AUTH token, we see only 2 fields in namely, username and password which the API will consume and provide us with the AUTH Token which will be further used in PUT, PATCH and DELETE API requests.
What is an AUTH Token?
Access tokens are used in token-based authentication to allow an application to access an API. The application receives an access token after a user successfully authenticates and authorizes access, then passes the access token as a credential when it calls the target API. The passed token informs the API that the bearer of the token has been authorized to access the API and perform specific actions specified by the scope that was granted during authorization.
Reference - https://auth0.com/docs/secure/tokens/access-tokens
Token Generation
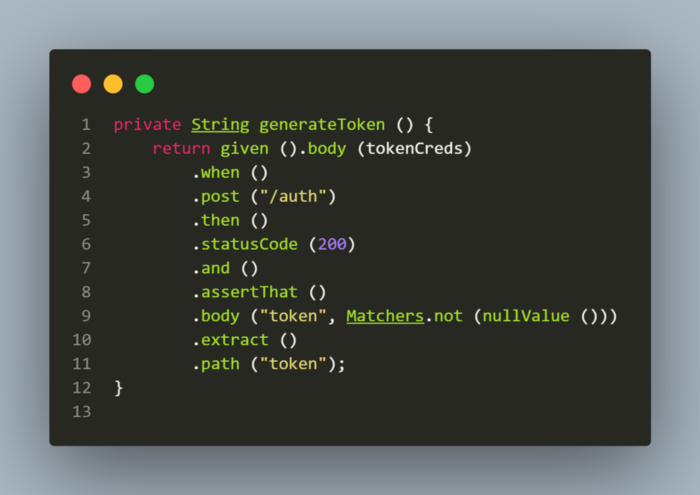
In the TokenBuilder class I have passed the actual value for the fields username and password. Since this is a demo project hence I have passed the static values in the class itself while building the data. Recommended way to pass the secure data is to use the String Interpolation and pass the data on run time.
As the token generated would be used in 3 different requests, hence it is recommended to generate a single method which would be called in the different requests instead of writing duplicate codes to generate token every time. Having said that, I have created a private method generateToken() which consumes the credentials and returns the token in String format.
Updating the Booking
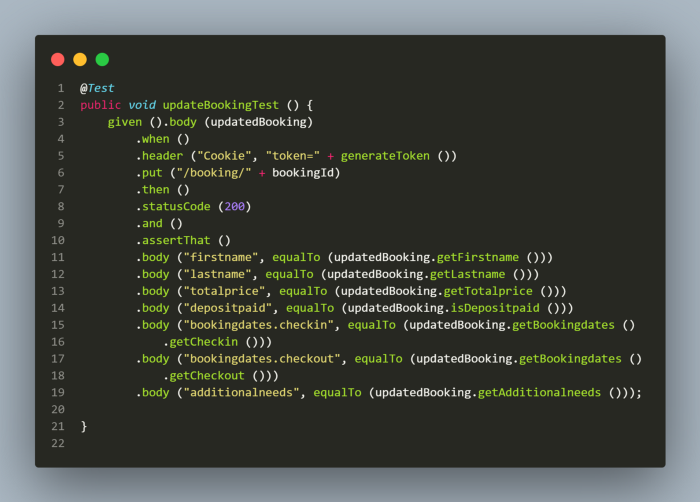
As mentioned above, the pattern to write the test is same as for Post API, the only difference here is, we are calling put() method and passing the /booking/ endpoint with bookingId which we extracted at the time of creating a booking. Also to note the header() method which passes the Cookie key and AUTH token value.
Assertions are made using the newly created updatedBooking data builder.
Updating a Booking Partially
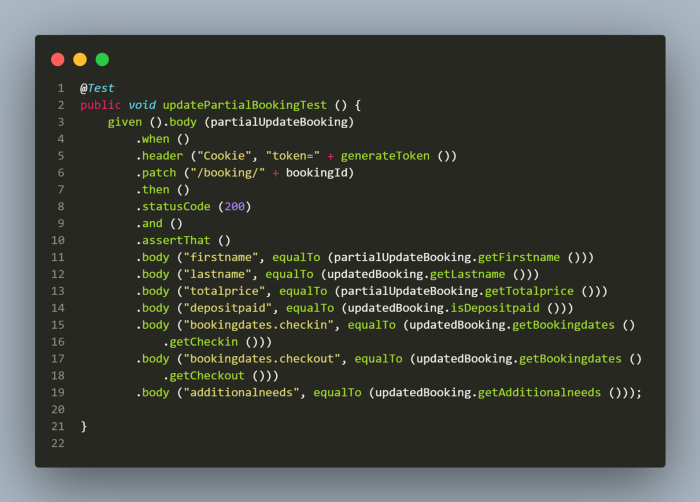
Using PATCH request you can modify only a few respective fields which needs to be updated, we don’t need to send all the fields like we do in PUT request.
firstname and totalprice fields are updated using PATCH request.The pattern to write the Partial update of the booking test is the same as we did for Update booking test. Starting with given() method and then asserting the status code and finally the response body. Taking a close look at the image above for partial update of the booking test you will notice that in assertions I have used the instance of partialUpdateBooking builder for asserting the firstname and totalprice values, for rest of the fields instance of updateBooking builder is used, as it is the latest builder used for the test data. Remember, we updated the booking after creating it!
Deleting a Booking
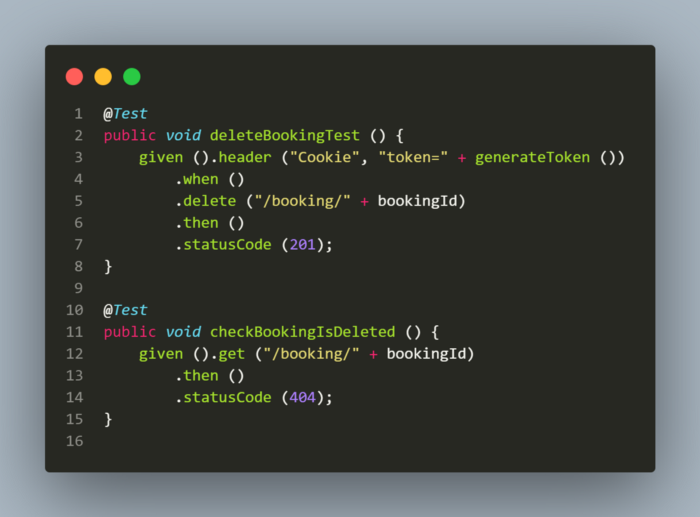
Now, comes the final stage of the test strategy we planned!
Its time now to delete the booking and check if the delete API is working as expected. The other way of looking at this is, we should always clear the data we generated using automated tests, if we don’t do it, we would be creating junk data in the system which would be useless and unnecessarily increase our server load and size of the DB, since every test run will keep on generating new set of booking records.
delete() method is used for deleting the booking. We are using the same bookingId which we saved while creating the booking, so we delete the same booking which we created using this end to end tests. Once delete API is called we assert that it should return status code 201(This is as per the API documentation of restful booker) from which we come to know that booking was deleted successfully. Ideally for delete status code returned is 204.
To make sure that booking was actually deleted, I have created one more test which will call the Get request and try to fetch the booking using the bookingId which was deleted and here we expect that it should return status code 404 which means data was not found and it assures us that the booking was actually deleted.
This marks the end of our end to end test scenarios!
Conclusion
To Conclude, we performed end to end for the restful booker APIs by creating a new booking, updating the newly created booking, partially updating the booking by modifying the firstname and totalprice values and then finally deleting the booking created. We also added a method which would generate token so we could use that method while updating and deleting the booking entries, as those entries require user authorization.
Hope you got a better understanding of rest-assured framework and how to perform API Testing and also test automation strategy!
Happy Testing!
**Github Repository
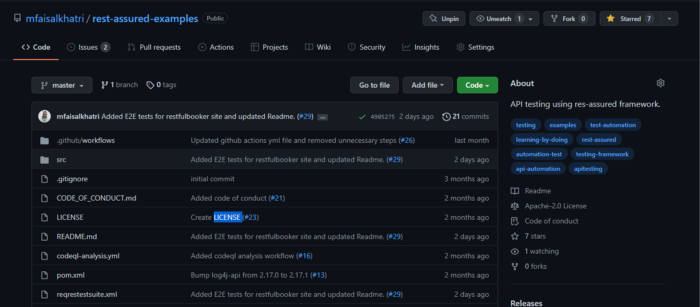
All of the code which is showcased above is located in this github repository.
Do mark a ⭐ and make the project popular so it reaches to the people who want to learn and upgrade and get better understanding about API Test Automation using rest-assured.
Paid Trainings
Contact me for Paid trainings related to Test Automation and Software Testing.